Think of starting red light therapy like beginning a new fitness routine for your skin. You know it’s good for you, but you need a plan to see real, lasting change. You wouldn’t just wander around the gym, right? The same idea applies here. To get that healthy glow, you need to know the fundamentals, starting with the most important question: how long should you use red light therapy on your face? We’ll guide you through creating the perfect ‘workout’ for your skin, covering session duration, weekly frequency, and the right technique to make every minute count.
Key Takeaways
- Create a consistent routine for the best results: Short, regular sessions are more effective than infrequent long ones. Aim for 10-20 minutes, 3-5 times per week, to continuously support your skin’s cellular repair process.
- Follow the fundamentals for every session: Always start with a clean, product-free face to allow for maximum light absorption. Most importantly, wear the provided eye protection—this is a non-negotiable step for your safety.
- Trust the process and manage expectations: Red light therapy works gradually with your skin’s natural cycle. Be patient and look for visible improvements in tone and texture within one to three months of starting your consistent routine.
What Is Red Light Therapy and How Does It Work?
If you’ve heard the buzz around red light therapy (RLT), you might be wondering what it is and if it actually lives up to the hype. Think of it as a gentle, therapeutic treatment that uses specific, low-level wavelengths of red light to recharge your skin on a cellular level. Unlike UV light from the sun, RLT is safe and doesn’t damage your skin. Instead, it penetrates deep into the skin’s layers to stimulate natural processes that can leave your complexion looking healthier and more vibrant.
The core of how it works lies in its ability to help your skin produce more collagen. Collagen is the essential protein that acts like scaffolding for your skin, keeping it firm, plump, and elastic. As we age, our natural collagen production slows down, which leads to fine lines and a loss of firmness. Red light therapy gives your cells the energy they need to kickstart that production again. It’s a non-invasive way to support your skin’s health from the inside out, making it a fantastic addition to any skincare routine.
What Red Light Therapy Does for Your Skin
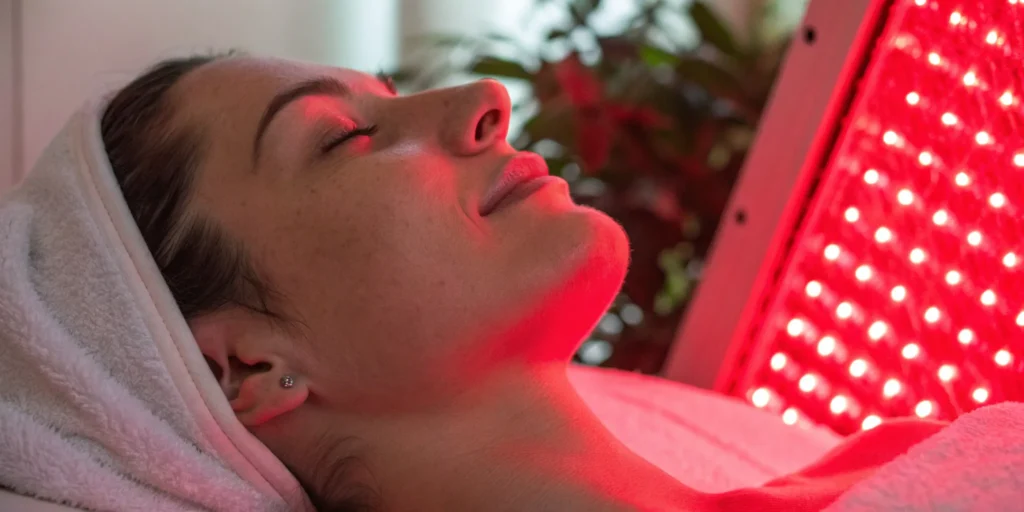
So, what’s happening beneath the surface during a red light therapy session? When the red light penetrates your skin, it’s absorbed by your cells’ mitochondria, which are like tiny power plants. This absorption gives them a jolt of energy, helping them function more efficiently and repair themselves more effectively. This improved cellular function is what leads to so many of the anti-aging benefits we love.
By encouraging your skin to create more collagen and elastin, RLT helps restore firmness and smooth out the appearance of fine lines and wrinkles. The result is an improvement in your skin’s overall texture and tone. It’s a gentle process that works with your body’s own healing mechanisms to create visible, lasting change.
Why Your Face Will Love Red Light Therapy
Using red light therapy consistently can bring a whole host of benefits to your facial skin. One of the most sought-after results is a reduction in the common signs of aging. Beyond smoothing wrinkles, it can also refine your skin’s texture, giving it a softer and more even feel. The therapy also promotes healing and can help calm inflammation, which is great for reducing redness and creating a more balanced complexion.
Getting the right amount of red light is crucial—too little won’t be effective, and too much might not deliver the results you want. That’s why professional treatments are so valuable; they ensure you get the precise dosage for your skin’s needs. Regular sessions are the best way to see significant improvement, which is why our clients often find that our med spa memberships make it easy to stay on track.
How Long Should You Use Red Light Therapy on Your Face?
When it comes to red light therapy, you might think longer sessions mean faster results, but that’s not quite how it works. Finding the right duration is key to getting that healthy, radiant skin you’re looking for. The goal is to give your skin cells the perfect amount of light energy to kickstart their rejuvenation process without overdoing it. Think of it like watering a plant—too little won’t do much, but too much can be counterproductive. The ideal session length depends on where you are in your treatment journey, from your very first session to maintaining your gorgeous glow. At Your Skin Prescription, we help our clients find that perfect balance to ensure every minute under the light counts. It’s all about creating a smart, effective routine that fits your skin’s unique needs and helps you achieve your goals in a safe, relaxing way.
Your First Session: How Long Should It Be?
If you’re just starting with red light therapy, the best approach is to ease into it. We recommend beginning with shorter sessions of about 5 to 10 minutes. This gives your skin a chance to acclimate to the therapy without feeling overwhelmed. It’s a gentle introduction that lets you see how your skin responds. During these initial treatments, make sure the device is positioned about 6 to 12 inches from your face. This ensures you get the benefits of the light without it being too intense. Starting slow allows you to build a solid foundation for a successful and comfortable red light therapy routine.
When to Increase Your Red Light Therapy Time
Once you’ve completed a few introductory sessions and your skin is responding well, you can gradually increase the duration. Most people find their sweet spot with sessions lasting between 10 and 20 minutes. This is generally the recommended timeframe to achieve the best results for skin rejuvenation, from reducing fine lines to improving overall tone. Listen to your skin and pay attention to your progress. As you start to see the results you want, you might even find you can maintain your glow with slightly fewer sessions per week. It’s all about tailoring the treatment to your personal skincare journey.
Why Session Length Matters for Your Results
Consistency will always be more effective than cramming in occasional long sessions. Think of it like exercise—a 15-minute workout every day yields better results than one long gym session every few weeks. The same principle applies to red light therapy. Regular, consistent use helps maintain the momentum of cellular repair and collagen production. Using red light therapy daily is safe and often recommended, especially when you first start. By incorporating it into your regular schedule, you ensure your skin receives a steady stream of benefits. A med spa membership can be a great way to build that consistency into your routine.
Factors That Influence Your Ideal Session Time
Figuring out the perfect red light therapy session time isn’t about finding a magic number—it’s about understanding what your skin needs. Several factors play a role in creating a routine that will give you the best results. Think of it as a personalized prescription for your skin. The ideal duration depends on the specific area you’re treating, the type of device you’re using, and, most importantly, your unique skincare goals. By considering these elements, you can move from a one-size-fits-all approach to a truly customized treatment plan that works in harmony with your skin.
Treatment Area: Face vs. Body
The area you’re treating is a major factor in determining session length. Your face is a smaller, more delicate area compared to larger parts of the body like your back or legs. For facial rejuvenation targeting concerns like fine lines and overall skin tone, a session of 10 to 15 minutes is typically the sweet spot. This is enough time for the light to penetrate effectively and stimulate cellular activity without overexposing the sensitive skin on your face. While you could use red light therapy on other parts of your body, the focused approach for the face ensures you get a concentrated treatment right where you want it most.
Device Distance and Dose
The effectiveness of your session also comes down to the “dose” of light your skin receives, and the distance from the device is a key part of that equation. For most at-home devices, the general rule is to position it about 6 to 12 inches from your skin. This ensures the light energy is absorbed properly. When you get a professional treatment, you don’t have to worry about these details. The equipment used at a med spa is precisely calibrated to deliver the optimal dose, ensuring every session is both safe and effective. This takes the guesswork out of the process and lets you simply relax and enjoy the results-driven services.
Your Personal Health and Skin Goals
Ultimately, your routine should be tailored to you. Your specific skin goals and sensitivity level are the most important factors. If your primary goal is to achieve a brighter, more even complexion, your session frequency might differ from someone focused on softening fine lines. If you have sensitive skin, it’s always best to start with shorter sessions of around 5 to 10 minutes and see how your skin responds before gradually increasing the time. This is where professional guidance from a medical aesthetician becomes so valuable. They can help you create a personalized plan that aligns with your goals and ensures your skin gets exactly what it needs.
How Often Should You Do Red Light Therapy on Your Face?
You’ve got the timing down for each session, but how often should you actually be using red light therapy on your face? Finding the right frequency is crucial for getting the results you want without overdoing it. Think of it like a workout routine for your skin—consistency is what builds strength and delivers visible changes. The goal is to create a sustainable schedule that stimulates your skin cells regularly without causing stress. Let’s break down what a typical routine looks like and how you can tailor it to your specific needs for that perfect, healthy glow.
Your Ideal Weekly Red Light Therapy Schedule
For most people, a great starting point is using your device for 10 to 20 minutes per session, about 3 to 5 times a week. This schedule strikes a nice balance between giving your skin the light it needs to kickstart collagen production and allowing it time to rest and repair. Sticking to this routine is generally effective for achieving noticeable results like smoother texture and a more even skin tone. It’s a manageable commitment that easily fits into your existing skincare regimen, whether you do it in the morning to start your day or at night to wind down.
Daily Use vs. Long-Term Maintenance
When you first begin, using red light therapy daily is not only safe but also highly effective for jumpstarting your skin’s rejuvenation. Think of this initial period as the active phase of your skin’s new routine, where consistent sessions build a strong foundation for collagen and elastin production. Once you start seeing the improvements you love—like a smoother texture and more even tone—you can transition into a maintenance schedule. This means you can often maintain your beautiful results with fewer sessions, perhaps dropping down to two or three times a week. It’s all about listening to your skin and adjusting your routine as you go, ensuring you get the most out of your treatments for the long haul.
How to Progress Your At-Home Treatment Plan
Think of the first month or so as an introductory period for your skin. It’s a good idea to stick with that 3-to-5-times-a-week schedule for the first 4 to 6 weeks. This initial phase gives your skin cells a chance to adapt to the treatment and begin the rejuvenation process. After that period, take a look at your skin. Are you seeing the changes you hoped for? You can adjust your frequency from there. Some people find they can maintain their results with just 2 or 3 sessions a week, while others might stick with the original schedule. It’s all about listening to your skin.
Finding Your Sweet Spot: Consistency Without Overdoing It
When it comes to red light therapy, consistency is far more important than intensity. A 15-minute session five times a week will always deliver better results than a single, hour-long session once a month. Regular, shorter treatments keep your cells stimulated and working efficiently. However, more isn’t always better. It’s important to know that overdoing it can have negative effects. Using a device for more than 30 minutes in one go can potentially lead to burns or blisters, so moderation is crucial. Stick to the recommended time and frequency to keep your skin happy, healthy, and glowing.
The “Biphasic Dose Response”: Why More Isn’t Always Better
It might sound like a complex scientific term, but the “biphasic dose response” is a straightforward concept that’s crucial for getting the most out of your red light therapy. It simply means there is an optimal dose for the best results. Think of it like taking a vitamin—the right amount supports your health, but taking way more than the recommended dose doesn’t provide extra benefits and can sometimes be counterproductive. The same is true for RLT. Too little light won’t have much of an effect, but too much can actually slow down cellular rejuvenation. This is why sticking to the recommended 10-to-20-minute sessions is so important. It ensures your skin gets the perfect amount of energy to stimulate collagen and repair itself without becoming overwhelmed, which could make it less effective.
Your Checklist for the Best Facial Red Light Therapy Results
Getting the most out of your red light therapy sessions comes down to a few simple but important steps. Think of it as creating the perfect canvas for the light to work its magic. By following these best practices, you’re not just doing a treatment; you’re creating a ritual that supports your skin’s health and helps you achieve those glowing results you’re looking for. From prepping your skin beforehand to caring for it after, each step plays a role in the overall effectiveness of your routine. At our Sewickley med spa, we guide you through this process to ensure a pampering and effective treatment, but these tips are essential whether you’re with us or using a device at home. Let’s walk through exactly what you need to do to make every session count.
How to Prep Your Skin Before a Session
Before you even turn on your device, the first step is to start with a completely clean face. You’ll want to remove all makeup, sunscreen, and any other products from your skin. This ensures there are no barriers that could block or reflect the light, allowing it to penetrate your skin more effectively. Use a gentle cleanser to wash your face and pat it dry. A clean, bare surface is the ideal starting point for any red light therapy session. This simple prep work makes a huge difference in how well your skin can absorb the light and respond to the treatment.
The Benefit of Slightly Damp Skin
Here’s a simple trick to make your red light therapy even more effective: leave your skin slightly damp after cleansing. Instead of patting your face completely dry, a little bit of moisture can actually help the light penetrate deeper into your skin’s layers. This enhances the treatment’s effectiveness and helps you get the most out of every minute. Think of the moisture as a conductor that helps guide the light to where it needs to go. It’s a small adjustment to your prep routine that can make a noticeable difference in your results over time, ensuring you’re maximizing the rejuvenating benefits of each session.
Treatments to Avoid Before Your Session
Timing is everything when it comes to your skincare routine, especially if you’re combining different treatments. To get the best results from red light therapy, it’s important to avoid certain procedures right before your session. Treatments like chemical peels or microdermabrasion can leave your skin feeling sensitive and may interfere with how well the light is absorbed. It’s best to give your skin a break and let it recover fully from these more intensive treatments before exposing it to the light. If you’re unsure how to schedule your appointments, it’s always a good idea to consult with a professional who can help you create a safe and effective treatment plan.
Does Device Placement Matter? (Yes!)
How you position your red light therapy device is key to getting great results. You don’t want it too close or too far away. The sweet spot for most devices is holding them about 6 to 12 inches from your skin. This distance allows the light to cover the treatment area evenly without being too intense. If you’re receiving a professional service, our skilled aestheticians will handle this for you, ensuring optimal positioning for every treatment. For at-home devices, always check the manufacturer’s instructions, but that 6-to-12-inch range is a reliable guideline for an effective and safe application.
Don’t Skip This Step: Protecting Your Eyes
This is a non-negotiable step: always protect your eyes. The light used in these devices is bright and can be harmful with direct exposure. Most professional treatments and quality at-home devices come with protective goggles—use them every single time. Even if you’re keeping your eyes closed, the light can still be too intense. Never look directly into the LEDs while the device is on. Taking this simple precaution ensures your sessions are not only effective for your skin but also completely safe for your vision. It’s a quick step that makes your relaxing experience totally worry-free.
What to Do After the Light Goes Off
Once your session is complete, it’s time for a little post-treatment care to maximize the benefits. Your skin is now perfectly prepped to absorb nourishing ingredients. This is a great time to apply your favorite hydrating serum or moisturizer. Look for products with ingredients like hyaluronic acid, peptides, or Vitamin C to support your skin’s rejuvenation process. Applying a quality skincare product afterward helps soothe and hydrate your skin, locking in moisture and enhancing the radiant results from your session. It’s the perfect finishing touch to your red light therapy routine.
Calming Your Skin with Post-Treatment Care
While red light therapy is gentle, your skin might feel a little warm or look slightly flushed afterward, which is completely normal. This is the ideal moment to apply a soothing serum or a lightweight moisturizer to calm and hydrate your skin. Products containing ingredients like hyaluronic acid or aloe vera are excellent choices because they help lock in moisture and reduce any temporary redness. This simple step not only feels amazing but also supports your skin’s recovery process, ensuring you leave your session feeling refreshed and looking radiant. It’s a crucial part of the entire experience, turning your treatment into a truly restorative ritual.
Is Red Light Therapy Safe? What You Need to Know
One of the best things about red light therapy is that it’s non-invasive and has a strong safety profile. It’s a gentle way to support your skin without the downtime of more intensive procedures. But just like any effective skincare treatment, following the rules is key to getting the beautiful results you want while keeping your skin happy and healthy.
Think of it as a partnership with your skin—you provide the light, and your skin does the work. To make sure that partnership is a successful one, it’s important to understand your skin’s limits, know when to take a day off, and recognize the signs of overdoing it. With a little bit of knowledge, you can make red light therapy a safe and incredibly rewarding part of your routine.
What If You Have Sensitive Skin?
Red light therapy is generally considered safe enough for daily use, but it’s always smart to listen to your body. If you have very sensitive skin, a little extra caution goes a long way. Before you begin regular sessions, try a patch test on a small, discreet area to see how your skin reacts.
It’s also best to avoid using red light therapy on skin that’s already stressed out, like with a sunburn or a rash. The goal is to heal and rejuvenate, not to add more irritation to the mix. For anyone with ongoing skin concerns, getting professional guidance is the best first step.
Are There Times You Should Skip a Session?
When it comes to red light therapy, more isn’t always better. Sticking to the recommended session length is crucial for safety and effectiveness. Pushing a session beyond 20 minutes won’t speed up your results and can actually cause skin irritation or, in rare cases, blisters. Always follow the guidelines for your specific device or the plan laid out by your aesthetician.
If you have an underlying skin condition or are just starting out with an at-home device, it’s a great idea to chat with a skincare professional first. A skilled aesthetician can help you figure out the perfect schedule for your unique skin goals.
Have You Overdone It? Signs to Watch For
Consistency is far more important than intensity. Using red light therapy for too long or too often can be counterproductive, and your skin will usually tell you if you’re overdoing it. Signs of overuse include any lingering redness, tenderness, or a feeling of tightness after a session. If you notice any of these, simply give your skin a break for a few days.
You should also avoid using the therapy on freshly damaged skin, whether from shaving or a recent cosmetic procedure. A well-structured treatment plan, like those offered in our med spa memberships, can help you stay on track and avoid overuse.
How to Choose the Right Red Light Therapy Device
When you’re ready to add red light therapy to your routine, you have two main paths: doing it yourself at home or seeking professional treatments. Both have their perks, and the right choice really depends on your lifestyle, budget, and skincare goals. At-home devices offer convenience, while professional sessions provide access to more powerful technology and expert guidance. Let’s break down what to consider so you can make a decision that feels right for you and your skin.
Panels vs. Wands: Which At-Home Device Is for You?
At-home red light therapy devices bring the treatment right to your bathroom counter, which is a huge plus for consistency. You’ll find everything from handheld wands for targeted spots to larger panels that can treat your whole face at once. The key to seeing results with these is commitment. Most devices require sessions of about 10 to 20 minutes, several times a week. For some, the sweet spot is treating your skin three times a week for at least four weeks to notice a real difference. While convenient, it means you’re the one responsible for sticking to the schedule and doing it correctly every single time.
Key Technical Specs to Look For
If you’re shopping for an at-home device, the technical details can feel a bit overwhelming. But you don’t need an engineering degree to figure it out. Understanding just a few key specifications will help you cut through the marketing noise and choose a device that’s actually effective. Think of it like reading a nutrition label—once you know what to look for, you can easily tell what’s good for you. Focusing on wavelength, power density, and safety features will ensure you invest in a tool that can deliver the results you’re looking for, safely and efficiently.
Understanding Wavelengths: Red vs. Near-Infrared
The wavelength of light, measured in nanometers (nm), determines how deeply it can penetrate your skin. Different depths target different concerns, so the right wavelength is crucial. Red light, typically in the 600-650 nm range, works closer to the skin’s surface. This makes it fantastic for addressing concerns like fine lines and overall skin tone. Near-infrared (NIR) light, usually between 700-900 nm, goes deeper to support healing and circulation. Many high-quality devices will offer both, giving you a comprehensive treatment that addresses your skin from the inside out.
Power Density (Irradiance) for Effective Treatment
Power density, also called irradiance, is basically a measure of how much light energy is reaching your skin. If the power is too low, you won’t get the cellular stimulation needed for real results. For an effective treatment, you’ll want a device that delivers a power density of at least 100 milliwatts per square centimeter (mW/cm²) at the recommended treatment distance. The best devices often use a combination of wavelengths, like 660 nm red light and 850 nm near-infrared light, to provide a potent dose. Always check the product specs for this number to ensure the device is powerful enough to make a difference.
Safety Features: Flicker-Free and Low EMF
Finally, safety should always be a top priority. As we emphasize at our Sewickley med spa, protecting your eyes is non-negotiable. Any reputable device should come with blackout goggles, and you should wear them for every single session. Beyond eye safety, look for devices that are flicker-free. Constant flickering can be straining on the eyes and brain. Another feature to consider is low EMF (electromagnetic fields). While the research on EMF is ongoing, choosing a low-EMF device is a simple way to minimize any potential risks and ensure your treatment is as relaxing and stress-free as possible.
Considering a Pro? What to Look for in a Treatment
When you opt for professional red light therapy, you’re getting access to powerful, medical-grade technology that isn’t available for home use. The biggest advantage is knowing you’re in expert hands. A key factor to consider is whether the equipment is FDA-cleared, which is a standard we prioritize to ensure both safety and effectiveness. Professional devices also offer more comprehensive care, with the ability to treat not just your face but also your neck, chest, and the delicate skin around your eyes. Consistent professional sessions, like those in our med spa memberships, can deliver more noticeable results without the guesswork.
Beyond Anti-Aging: Guidelines for Other Goals
While red light therapy is a superstar for turning back the clock on fine lines, its benefits don’t stop there. This versatile treatment can address a range of other concerns, from calming breakouts to supporting your body’s recovery process. The key, as always, is tailoring the session length and frequency to your specific goal. Whether you’re looking to clear up your complexion or even encourage healthier hair, there’s a red light therapy routine that can help. Let’s explore the guidelines for some of these other popular uses.
For Acne-Prone Skin
If you’re dealing with breakouts, red light therapy can be a wonderfully gentle ally. Instead of using harsh treatments that can strip your skin, RLT works by calming the inflammation that often comes with acne. This helps reduce redness and swelling, allowing your skin to heal more effectively. For tackling acne, the general recommendation is to use red light therapy for about 10 to 15 minutes, 3 to 4 times per week. This consistent schedule helps keep inflammation in check and supports a clearer, more balanced complexion over time. It’s a soothing approach to managing breakouts without causing additional irritation.
For Pain Relief and Muscle Recovery
It might sound surprising, but red light therapy can also be a great tool for soothing sore muscles and easing discomfort. The light penetrates deeply into your tissues, helping to support muscle repair and reduce inflammation after a tough workout or a long day. For pain relief and recovery, sessions are typically a bit longer, around 15 to 20 minutes, and can be done 3 to 5 times a week. This allows the light enough time to assist in the healing process, making it a fantastic, non-invasive option to add to your wellness routine.
For Hair Growth
Red light therapy is also gaining attention for its potential to support healthier hair. The treatment works by stimulating the hair follicles on your scalp, which can encourage a more robust growth cycle. If you’re looking to use RLT for this purpose, a consistent but gentle approach is best. The suggested routine is typically a 10-minute session every other day. This frequency is thought to be effective for energizing the follicles without overdoing it. It’s an interesting and non-invasive way to complement your existing hair care regimen and promote a healthier scalp environment.
Recommended Times for Different Device Types
The ideal length of your red light therapy session often depends on the type of device you’re using. Different tools deliver light with varying intensity and coverage, so the timing needs to be adjusted accordingly. Most treatments will fall somewhere between 5 and 20 minutes for each area you’re focusing on. Whether you’re using a full-face mask or a targeted wand, understanding the specific recommendations for your device is key to getting the best and safest results for your skin.
LED Face Masks
LED face masks are a popular at-home option because they’re so easy to use—just put one on, relax, and let it work. These devices are designed to treat your entire face at once, making them very efficient for addressing concerns like fine lines or acne. A typical session with an LED face mask lasts between 10 and 15 minutes. This is the perfect amount of time to deliver effective light therapy for skin rejuvenation without requiring a huge time commitment.
Handheld Wands
Handheld wands are perfect for targeted treatments. If you have a specific blemish, a fine line, or a small area of discomfort you want to focus on, a wand gives you that precision. Because they concentrate light on a smaller spot, sessions are usually shorter. Using a handheld wand for about 5 to 10 minutes on a specific area is generally enough to provide an effective treatment, whether you’re addressing a breakout or a sore joint.
Light Therapy Panels
For treating larger areas of the body, light therapy panels are the way to go. These larger devices can cover your entire back, legs, or chest, making them ideal for full-body benefits like muscle recovery or addressing skin concerns on a broader scale. Sessions with a light therapy panel typically last between 10 and 20 minutes per area. This duration ensures the light has enough time to penetrate and work effectively across a larger surface.
What Results Can You Realistically Expect?
When you start a new skincare treatment, it’s natural to be excited and maybe a little impatient to see changes. Red light therapy is incredibly effective, but it’s a marathon, not a sprint. The light works at a cellular level to encourage collagen production and reduce inflammation, and this process takes time. While the therapy starts working from your very first session, visible results will appear gradually as your skin cells regenerate and repair.
Think of it like starting a new fitness routine. You don’t see a dramatic change after one trip to the gym, but with consistent effort, the results build on each other. The key is to be patient and stick with your schedule. Your specific skin concerns, the type of device used, and how consistently you follow your treatment plan all play a role in your personal timeline. It’s a cumulative process, where each session contributes to the final outcome. At Your Skin Prescription, we create a personalized plan to set you up for success, ensuring you feel supported and confident as you work toward your skincare goals. Our med spa memberships are a great way to stay on track with your treatments and make self-care a seamless part of your routine.
How Long Does It Take to See Results?
So, when will you actually see a difference in the mirror? Generally, you can expect to notice clearer, more visible improvements within one to three months. For concerns like fine lines and wrinkles, this steady approach pays off. One study even found that participants saw a significant reduction in the depth of their crow’s feet after just three months of consistent use.
It’s also important to remember that for ongoing concerns like anti-aging or chronic skin conditions, red light therapy is part of a long-term maintenance plan. To keep enjoying the benefits, you’ll want to continue with regular sessions. This helps maintain the collagen production and anti-inflammatory effects you’ve worked to achieve.
Setting Realistic Skincare Goals with Red Light
Getting the best results from red light therapy comes down to consistency and finding the right balance. Just like any other part of your skincare routine, skipping sessions will slow down your progress. It’s also important to understand that there’s a “sweet spot” for how much light your skin needs. While it might be tempting to do longer or more frequent sessions, using it more than recommended won’t speed things up and could even be counterproductive.
For most skin issues, a 10- to 15-minute session a few times a week is perfect. The strength of the device also matters—professional-grade equipment can deliver more effective results in a shorter amount of time. We’ll guide you on the ideal frequency and duration to ensure your skin gets exactly what it needs.
Putting It All Together: Your Perfect RLT Routine
Getting the glowing results you want from red light therapy comes down to one thing: consistency. Think of it like a new fitness plan—you can’t just show up once and expect a total transformation. The real magic happens when you create a simple, sustainable routine that works for you. Building this habit doesn’t have to be complicated. It’s all about setting a clear schedule and paying attention to how your skin responds along the way. By following a few straightforward steps, you can personalize your approach and ensure you’re getting the most out of every single session. Let’s walk through how to build a routine that feels less like a chore and more like a well-deserved moment of self-care.
How to Create Your Personal Treatment Schedule
When you’re just starting, a great goal is to use your red light therapy device for about 10 to 20 minutes per session, three to five times a week. Sticking to this for the first month or so allows your skin to acclimate to the treatment and starts the cellular renewal process. It might be tempting to think that more is better, but it’s important to resist the urge to overdo it. Using the light for longer or more often than recommended won’t fast-track your results and can actually hinder your progress. The key is finding that sweet spot where you’re consistent without overwhelming your skin. Our team of skilled aestheticians can always help you fine-tune a schedule that aligns perfectly with your skin goals.
How to Track Your Progress (and Why You Should)
Like any part of your skincare regimen, red light therapy works best when you listen to your skin. Pay attention to how it looks and feels after each session. Does it feel calm and look a little brighter? These are great signs you’re on the right track. It’s also a fantastic idea to take weekly photos in the same lighting to track your progress. You might notice subtle improvements like a more even tone or a healthy glow within the first few weeks, while bigger changes take more time. If you maintain your routine, you’ll see the benefits build. A med spa membership can be an amazing way to stay consistent and get professional guidance as you go.
Are You Making These Red Light Therapy Mistakes?
Red light therapy is a wonderfully straightforward treatment, but a few common slip-ups can keep you from seeing the glowing results you’re after. Think of these less as “mistakes” and more as simple tweaks to your routine that will make all the difference. Getting these details right ensures every session is as effective as possible, helping your skin soak up all the benefits. Whether you’re using a device at home or coming in for a professional treatment, being mindful of these points will help you achieve your skincare goals faster.
The good news is that these are all easy fixes. It’s all about building good habits around your sessions so that the process becomes second nature. At Your Skin Prescription, we guide our clients through every step, ensuring they feel confident and cared for. For those who want to make professional treatments a seamless part of their routine, our med spa memberships are a great way to stay on track and let us handle the details for you. Let’s walk through the most common hurdles and how to clear them with ease.
Mistake #1: Skipping the Goggles
This one is non-negotiable. The LED lights used in therapy are very bright and concentrated, and you should never look directly into them. Even if you’re just closing your eyes, it’s not enough to fully protect them from the intense light. Always use the FDA-cleared protective goggles that come with your device or are provided during a professional session. It might seem like a small step to skip, but potential damage to your eyes just isn’t worth the risk. Make putting on your goggles the very first thing you do before turning on the light.
Mistake #2: Not Sticking to a Schedule
Think of red light therapy like a new fitness routine. You wouldn’t expect to see toned muscles after just one trip to the gym, and the same principle applies here. Consistency is absolutely crucial for achieving and maintaining results. Sporadic sessions just won’t give your cells the regular energy infusion they need to repair and rejuvenate. To truly see a change in your skin’s texture, tone, and firmness, you need to stick to a regular schedule. As one source puts it, red light therapy needs to be used regularly to be effective. Skipping sessions will only delay your progress.
Mistake #3: Sitting Too Close (or Too Far)
Where you position the device in relation to your skin matters—a lot. If it’s too far away, the light energy won’t be concentrated enough to penetrate your skin effectively. If it’s too close, you might create hot spots and an uneven treatment. There’s a sweet spot that ensures optimal light absorption. Most at-home devices work best when positioned about 6 to 12 inches from your skin. This distance allows the light to cover the treatment area evenly without losing its power. Always check the manufacturer’s instructions, as this can vary slightly between devices, but getting the distance right is key to a successful session.
Related Articles
- Red Light Therapy: Benefits, Uses, and What to Expect
- Find Light Therapy Near You for Healthier Skin
- Red Light Therapy: All Your Questions Answered – Your Skin Prescription
Frequently Asked Questions
What does a red light therapy session actually feel like? It’s a very relaxing and gentle experience. You’ll feel a subtle, pleasant warmth on your skin during the session, but it shouldn’t feel hot or uncomfortable at all. Many of our clients find it to be a calming and meditative part of their day. It’s completely non-invasive, so there’s no pain or discomfort involved, just a peaceful moment for you and your skin.
Is red light therapy safe for sensitive skin? Yes, one of the great things about red light therapy is that it’s gentle enough for most skin types, including sensitive skin. Unlike UV light, it doesn’t damage the skin’s surface. However, if your skin is particularly reactive, it’s always a good idea to start with shorter sessions to see how it responds. We always recommend a consultation to ensure the treatment plan is perfectly suited to your skin’s unique needs.
Can I use my regular skincare products with red light therapy? You should always start your session with a clean, dry face, free of any makeup or skincare products. This ensures there are no barriers preventing the light from penetrating your skin effectively. The best time to apply your favorite serums and moisturizers is immediately after your session, as your skin is perfectly prepped to absorb all those nourishing ingredients.
Why is consistency so important with red light therapy? Think of it like watering a plant; a little bit of water on a regular basis is what helps it thrive. Red light therapy works in a similar way by giving your skin cells a steady supply of energy. Each session builds on the last to stimulate collagen production and promote healing. Sporadic treatments just won’t provide the cumulative effect needed to see significant, lasting changes in your skin’s tone and texture.
What’s the main advantage of getting professional treatments over using a device at home? The biggest differences are the power of the technology and the expertise of a professional. At a med spa, we use medical-grade devices that are much more powerful than what’s available for at-home use, which can lead to more efficient and noticeable results. Plus, you have a skilled aesthetician guiding your treatment, ensuring the session length, frequency, and positioning are all tailored perfectly to your skin goals, taking all the guesswork out of the process for you.